LinkWithin

Related Posts Plugin for WordPress, Blogger...

Friday, June 8, 2012

Ubuntu 12.10 Quantal Quetzal Alpha 1 dirilis


Ubuntu 12.10 "Quantal Quetzal " Alpha 1 telah dirilis. Di Ubuntu 12.10 Quantal Quetzal ini terdapat beberapa update packages diantaranya Kernel Ubuntu 12.10 menggunakan versi Kernel 3.4.0-5.11, ini merupakan update dari kernel Ubuntu 3.2.0-23.36 yang dipakai di Precise Pangolin 12.04. GCC versi 4.7 menggantikan versi 4.6 yang disertakan di Ubuntu 12.04 Precise Pangolin. Dan Python 3 akan menggantikan Python 2. Untuk lebih detailnya tentang Ubuntu 12.10 Quantal Quetzal, kunjungi web Wiki Ubuntu.

Link Download Ubuntu 12.10 Quantal Quetzal Alpha 1:
Ubuntu 12.10 Quantal-desktop-i386.iso (728MB, torrent)
Ubuntu 12.10 Quantal-desktop-amd64.iso (726MB, torrent)

Friday, May 11, 2012

Install Google Chrome di Ubuntu 12.04 Precise Pangolin

Google Chrome adalah web browser gratis yang dikembangkan oleh Google. Salah satu web browser populer dan banyak digunakan oleh sebagian besar pengguna internet, Google Chrome tersedia untuk sistem operasi Linux, Windows dan Mac OS.

Sebelum meng-Install Google Chrome di Ubuntu 12.04 Precise Pangolin, Download terlebih dahulu Google Chrome dengan meng-click link dibawah.

Download Google Chrome

Setelah download selesai, buka Terminal melalui tombol kombinasi (Ctrl + Alt + T) atau melalui menu Dash Home. Setelah itu, jalankan perintah berikut di Terminal.
  • sudo apt-get install libcurl3 libnspr4-0d ( jika perintah ini gagal, jalankan perintah berikut:  sudo apt-get install -f )
  • cd Downloads (masuk ke folder yang menyimpan file Google Chrome yang telah di Download, contoh kali ini, file berada di folder Download)
  • sudo dpkg -i google-chrome-stable_current_i386.deb

Tuesday, May 8, 2012

Download Video Youtube melalui Terminal Ubuntu

Untuk mendownload video Youtube melalui terminal, pertama yang harus dilakukan adalah meng-install utility youtube-dl.
1. Buka Terminal (Ctrl + Alt + T) atau melalui Menu Dash Home
2. Jalankan perintah berikut
  • sudo apt-get install youtube-dl
3. Setelah terinstall, buka Youtube melalui browser, pilih video yang akan di Download dan copy URL Video tersebut.
4. Jalankan perintah berikut di Terminal
  • youtube-dl URL_Video_Youtube

Mengaktifkan User root di Ubuntu

Untuk mengaktifkan user root (dalam mode GUI, dari login prompt) di Ubuntu 11.10 (Ocelot Oneiric) adalah sebagai berikut.

1. Buka Terminal (Ctrl + Alt + T) atau melalui menu Dash Home. Jalankan perintah berikut:
  • sudo passwd root
2. Masukkan password login anda, kemudian diikuti dengan memasukkan password baru untuk user root (Enter new UNIX password) tekan Enter, lalu ulangi password user root (Retype new UNIX password) dan tekan Enter. "password updated succesfully".

3. Sekarang, untuk menguji login root dalam mode GUI. Logout dari sesion saat ini dan pilih root sebagai user, dan masukkan password root.

Monday, May 7, 2012

Upgrade Ubuntu 11.10 (Oneiric Ocelot) ke Ubuntu 12.04 (Precise Pangolin)

Ubuntu 12.04 LTS (Precise Pangolin) telah dirilis dengan beberapa fitur baru yang keren. Jika Anda menggunakan Ubuntu 11.10 (Oneiric Ocelot) maka Anda dapat meng-upgrade-nya ke Ubuntu 12.04 LTS (Precise Pangolin). Anda dapat meng-upgrade ke Ubuntu 12.04 LTS (Precise Pangolin) dengan berbagai cara, misal dari Terminal atau Update Manager atau Anda bisa men-download ISO dan meng-upgrade menggunakan bootable media seperti (CD / DVD / USB). Metode pertama dan kedua membutuhkan koneksi yang lumayan cepat dan stabil, tetapi jika Anda tidak mempunyai koneksi internet ataupun koneksi internet yang lambat, lebih baik untuk upgrade-nya dengan Metode ketiga, yaitu menggunakan media bootable. Dengan cara mengcopy ISO Ubuntu 12.04 dari teman Anda, atau download dulu dari warnet, kemudian di Burning ke CD / DVD atau di buat bootable USB Flashdisk.

Upgrade Ubuntu 11.10 ke 12.04 LTS melalui Update Manager
Pertama-tama Backup semua file-file penting Anda.
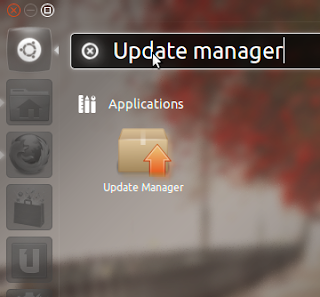
1. Buka Update Manager
2. Kemudian Anda akan melihat informasi upgrade tentang rilis terbaru dari ubuntu.
3. Sekarang, klik pada tombol Upgrade untuk melanjutkan (Anda harus mengkonfirmasi di jendela baru) dan menunggu saat upgrade proses selesai.


Upgrade Ubuntu 11.10 ke 12.04 LTS melalui Terminal
Buka Terminal (Ctrl + Alt + t) dan jalankan perintah berikut:
  • sudo apt-get update 
  • sudo do-release-upgrade


Upgrade Ubuntu 11.10 ke 12.04 LTS melalui Bootable Media (CD/DVD/USB)
Masukkan live CD atau boot dari live CD untuk memulai menginstal, setelah itu akan muncul pilihan untuk upgrade ke Ubuntu 12.04 LTS.

Install System Wide PulseAudio Equalizer di Ubuntu 11.10

Sistem-Wide PulseAudio Equalizer merupakan aplikasi sederhana (sebenarnya script ) yang berfungsi untuk mengatur bass treble musik sesuai yang kita inginkan. PulseAudio Equalizer ini dikembangkan oleh seorang pengguna Ubuntu.

Untuk meng-install PulseAudio Equalizer, jalankan Terminal dengan menekan tombol kombinasi keyboard (Ctrl + Alt + T) atau melalui Menu di Ubuntu. Kemudian jalankan perintah berikut di Terminal:
  • sudo add-apt-repository ppa:nilarimogard/webupd8
  • sudo apt-get update
  • sudo apt-get install pulseaudio-equalizer

Perintah-perintah penting Linux Ubuntu

Add a user
sudo adduser USER_NAME
Delete a user
sudo deluser USER_NAME

Change user password
sudo passwd USER_NAME

Changes user fullname, office number, office extension, and home phone number information.
sudo chfn USER_NAME
Display user information
finger USER_NAME

Temporarily prevent a user from logging in
sudo usermod -L USER_NAME
Revoke the operation above
sudo usermod -U USER_NAME

Add a user to admin group
sudo usermod -G admin -a USER_NAME
 
Clear Bash history
history -c

Display Linux distributor's ID
lsb_release -is

Display Linux release number
lsb_release -rs

Display Linux code name
lsb_release -cs

Display machine hardware name
uname -m

List all PCI devices, such as display card and ethernet card.
lspci

Reclaim memory which stores pagecache, dentries and inodes
echo 3 > /proc/sys/vm/drop_caches

Display a list of modules in the Linux Kernel
lsmod

List USB devices
lsusb -v

Display the status of ethernet card
sudo ethtool eth0

List hardware
sudo lshw

List harddisk partitions
sudo fdisk -l

Display SATA harddisk parameters
sudo hdparm -I /dev/sda

Display disk space usage
df -h

Display file/folder space usage
du -bsh FOLDER_NAME

Display amount of free and used memory
free

Display processes
ps -e
Display a tree of processes
pstree
Display processes dynamically
top

Terminate a process with a given process id
sudo kill -9 PROCESS_ID

Terminate all processes with a given name
sudo killall PROCESS_NAME

List files which are opened by a given process
lsof -p PROCESS_ID
lsof -c PROCESS_NAME

List processes which opened a given file
lsof FILE_NAME

List processes which are using port 80
lsof -i :80

Configure an ADSL connection
sudo pppoeconf

Starts up ADSL connections
sudo pon
Shuts down ADSL connections
sudo poff

Display MAC of a given IP address
arping IP_ADDRESS

Display NetBIOS name of a given IP address
nmblookup -A IP_ADDRESS

Display IP address and MAC
ifconfig -a

Display route
netstat -rn

Set MAC of ethernet interface
sudo ifconfig eth0 hw ether 00:11:22:33:44:55

Display information of a domain name
whois example.com

Display the network path to a given host
tracepath example.com

Request an IP address from DHCP server
sudo dhclient

Temporarily restart an init script
sudo /etc/init.d/SCRIPT_NAME restart
Temporarily stop an init script
sudo /etc/init.d/SCRIPT_NAME stop
Set the HTTP proxy
export http_proxy=http://PROXY.DOMAIN.NAME:PORT

Modify the information displayed after logging in
sudo vim /etc/motd.tail

Choose the input method for X Window
im-switch -c

Convert the file name from GBK to UTF8
convmv -r -f gbk -t utf8 --notest FILE_NAME

Convert the file content from GBK to UTF8
iconv -f gbk -t utf8 FILE_NAME

Convert tags in '*.mp3' from GBK to UTF8
find . -name '*.mp3' -execdir mid3iconv -e GBK {} \;

Read a long file
less FILE_NAME

Print lines matching a pattern
grep REG_EXP FILE_NAME

Display a list of file name. The files contain a given string.
grep -lr REG_EXP PATHNAME

Display all '.txt' file
find . -name '*.txt'

Create two empty files
touch file_name_1 file_name_2

Create directory. Create parent directories as needed.
mkdir -p /tmp/a/b/c/d/e

Change working directory to the home folder
cd
Change working directory to the previous working directory
cd -

Display hidden files
ls -a

Copy directory. Preserve links, file mode, ownership, timestamps.
cp -a SOURCE_DIRECTORY DEST_DIRECTORY

Determine file type
file FILE_NAME

Output the last 6 lines
tail -n 6 FILE_NAME

Copy files via SSH
scp -rp FILE_NAME USERNAME@HOST:DEST_PATH

Rename '*.rm' files to '*.rmvb' files
rename 's/.rm$/.rmvb/' *

Change the file name to lowercase
rename 'tr/A-Z/a-z/' *

Display subdirectories in current directory
ls -d */.

Display file number in current directory
ls . | wc -w

Extract "*.gz" file
gunzip FILE_NAME.gz
Extract "*.tar.gz" file
tar zxf FILE_NAME.tar.gz
Extract "*.tar.bz2" file
tar jxf FILE_NAME.tar.bz2

Do compression
tar czf FILE_NAME.tar.gz FILE1 FILE2 FILE3
tar cjf FILE_NAME.tar.bz2 FILE1 FILE2 FILE3

Displays a calendar
cal
cal MONTH YEAR

Set the date and time via NTP
sudo ntpdate ntp.ubuntu.com

Poweroff your computer
sudo halt
sudo shutdown -h now
Poweroff your computer in 23:00
sudo shutdown -h 23:00
Poweroff your computer after 60 minutes
sudo shutdown -h +60

Reboot your computer
sudo reboot
sudo shutdown -r now

If you want some program to start up automatically, please put '.desktop' files into '~/.config/autostart'

You can configure "preferred applications" by this file "~/.local/share/applications/mimeapps.list"

Continuously monitor the memory usage
watch -d free

Display HTTP HEAD response
w3m -dump_head http://example.com

Display file content with line number
nl FILE_NAME

Eliminate Rootkit
sudo rkhunter --checkall

Change hostname
sudo hostname new_name

"Tasksel" group software packages into "task"s. You can select a "task" and then install all necessary software packages. It is easy to set up LAMP servers or cloud computing servers.
Show all tasks
tasksel --list
Display the extended description of a task
tasksel --task-desc lamp-server
List the packages which are parts of a task
tasksel --task-packages lamp-server
Install/remove a task
gksudo tasksel

Change Process priority
renice NEW_PRIORITY `pgrep NAME_OF_PROCESS`
example: renice 5 `pgrep firefox`
renice -5 `pgrep wine-server`
high <------------------> low
NEW_PRIORITY = -19, -18, -17 [...] 18, 19, 20

~/.thumbnails/ directory is a cache dir GNOME makes when you browse through your folders in nautilus.
It contains thumbnail pictures of picture files you've previously looked at.You can get its total size by
du -bs ~/.thumbnails/

You can delete the files in the .thumbnails directory that haven't been accessed for seven days, to free disk space.
find ~/.thumbnails/ -type f -atime +7 -exec rm {} \;

Capture screen after 10 seconds
gnome-screenshot -d 10
Capture current window after 10 seconds
gnome-screenshot -wd 10

Start GConf editor:
Press Alt+F2, type 'gconf-editor'.

Set apt source
sudo software-properties-gtk
sudo software-properties-kde

Display the packages which are not installed but have remained residual config
dpkg -l | awk '/^rc/ {print $2}'

Add a PPA repository:
sudo add-apt-repository ppa:PPA-REPOSITORY-NAME

Display a list of files. The files are installed from a given package.
dpkg -L PACKAGE_NAME

Display a list of packages. The packages installed a given file.
dpkg -S FILE_NAME

Display a list of packages. The name of packages matches given regex pattern.
apt-cache search REG_EXPRESSION

Display a list of packages. The packages provide a given file.
apt-file search FILE_NAME

Display a list of packages. The given package depends on the list of packages.
apt-cache depends PACKAGE_NAME

Display a list of packages. These packages depend on the given package.
apt-cache rdepends PACKAGE_NAME

Prompt for a disk to be inserted and then add the disc to the source list.
sudo apt-cdrom add

Install the newest versions of all packages currently installed on the system.
sudo apt-get upgrade

Delete residual package configuration files.
dpkg -l | grep ^rc | awk '{print $2}' | sudo xargs dpkg -P

Automatically install necessary files for './configure ; make ; make install'
sudo auto-apt run ./configure

Save the list of packages currently installed on your system.
dpkg --get-selections | grep -v deinstall > SOME_FILE
Then use the file to restore packages.
dpkg --set-selections < SOME_FILE ; sudo dselect

After running "sudo apt-get install", "*.deb" files are stored in "/var/cache/apt/archives"
You can clean this directory by:
sudo apt-get clean
Display URL for a given package
apt-get -qq --print-uris install PACKAGE_NAME
Display some statistics about the apt cache
apt-cache stats
Display all package name
apt-cache pkgnames
Display some information of a given package
apt-cache show PACKAGE_NAME


source

Friday, May 4, 2012

Install Handbrake Video Converter di Ubuntu 11.10 Oneiric Ocelot

Handbrake adalah aplikasi video converter yang paling populer di ubuntu. Handbrake memiliki banyak fitur-fitur keren yang membuatnya menjadi yang terbaik, dan tentu saja itu sangat mudah digunakan.

Untuk meng-instal Handbrake, jalankan Terminal dengan menekan tombol kombinasi keyboard (Ctrl + Alt + T) atau melalui Menu di Ubuntu. Kemudian jalankan perintah berikut di Terminal:
  • sudo apt-add-repository ppa:stebbins/handbrake-releases
  • sudo apt-get update
  • sudo apt-get install handbrake

Thursday, May 3, 2012

Install Precise Tweak di Ubuntu 12.04 (Precise Pangolin)

Precise Tweak adalah nama baru dari Ubuntu Tweak, sebuah aplikasi populer untuk meng-custom Ubuntu Desktop. Precise Tweak merupakan tool untuk mengkonfigurasi desktop dengan mudah karena menggunakan antarmuka grafis.

Terdapat beberapa fitur menarik termasuk Theme options, Admin options (untuk me-manage paket ataupun aplikasi), Janitor (untuk menghapus paket yang tidak diinginkan), Login Page, dan lain-lain.

Untuk meng-instal Blender 2.63, jalankan Terminal dengan menekan tombol kombinasi keyboard (Ctrl + Alt + T) atau melalui Menu di Ubuntu. Kemudian jalankan perintah berikut di Terminal:
  • sudo add-apt-repository ppa:tualatrix/ppa 
  • sudo apt-get update 
  • sudo apt-get install ubuntu-tweak